In this article, I’m going to cover how to install and configure Terraform for managing AWS resources.
Requirements
- Active AWS account
- Development PC where Terraform can be installed
Installation
Terraform
Navigate to the Terraform downloads page for detailed instructions on installing Terraform for your OS.
In this example, I’ll be downloading the binary package for MacOS.
The installation steps involve downloading the Terraform binary and moving it into a path that’s in my $PATH variable.
Use curl to download the Terraform binary
curl https://releases.hashicorp.com/terraform/1.6.3/terraform_1.6.3_darwin_arm64.zip -o terraform.zip
Unzip the file
unzip terraform.zip
Move Terraform binary to /usr/local/bin
sudo mv terraform /usr/local/bin/
Verify Terraform CLI by viewing the version
terraform --version
AWS CLI
In order to provision AWS resources with Terraform the AWS CLI will need to be installed. For detailed instructions follow the steps here to install the latest AWS CLI version for your OS.
In this example, I’ll be downloading the package for MacOS.
Use curl to download the AWS CLI package
curl "https://awscli.amazonaws.com/AWSCLIV2.pkg" -o "AWSCLIV2.pkg"
Install the package
sudo installer -pkg AWSCLIV2.pkg -target /
Verify AWS CLI by viewing the version
aws --version
Now that Terraform and the AWS CLI are installed, let’s create a new AWS user.
Create AWS user with administrator permissions
Before using Terraform we need to create a new user in our AWS account that has programmatic access. This is because Terraform uses API calls to retrieve and provision resoureces in the AWS account.
Since this is a lab environment I created a new user with administrative privileges in the AWS console. In production you will want to use the principle of least privilege and only assign the necessary permissions for the user.
- In the AWS console, go to IAM
- In the left nav under Access management, click Users
- On the Users screen, click Create User
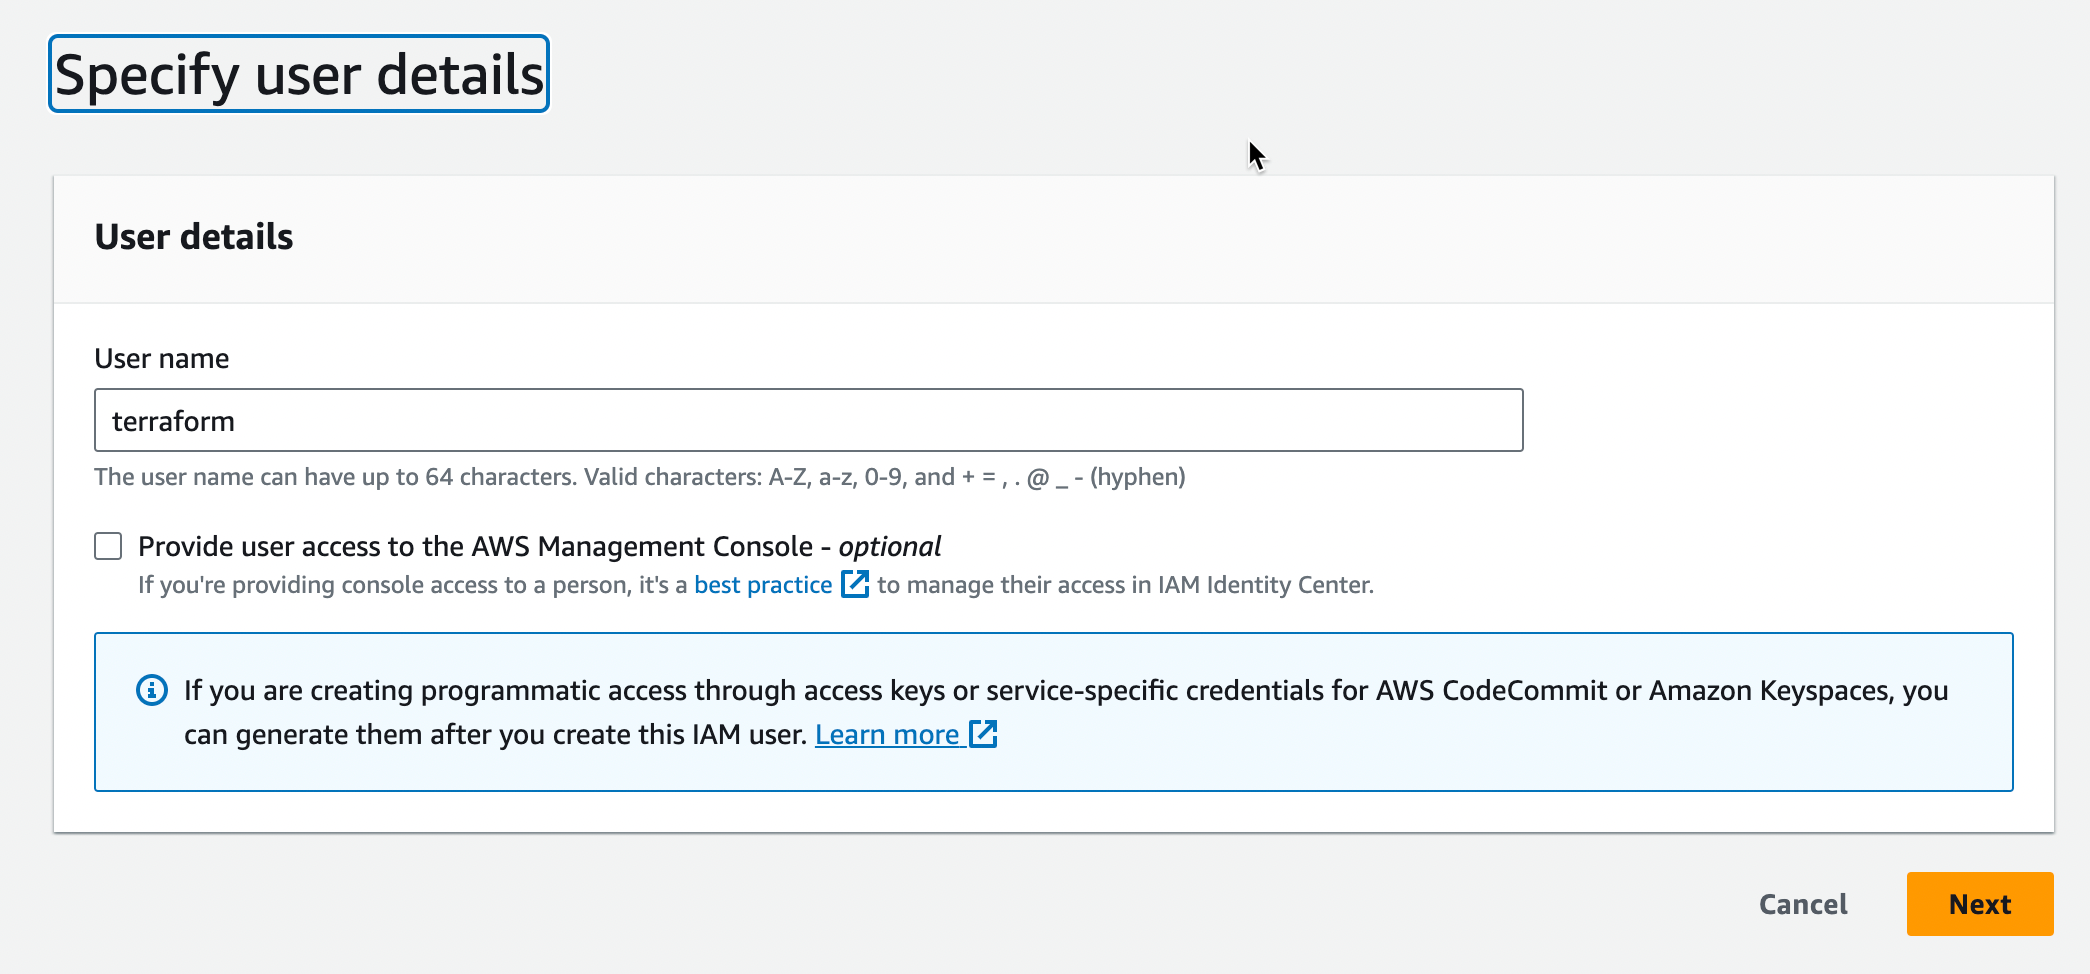
- On the Specify user details screen, enter the User name

- Click Next
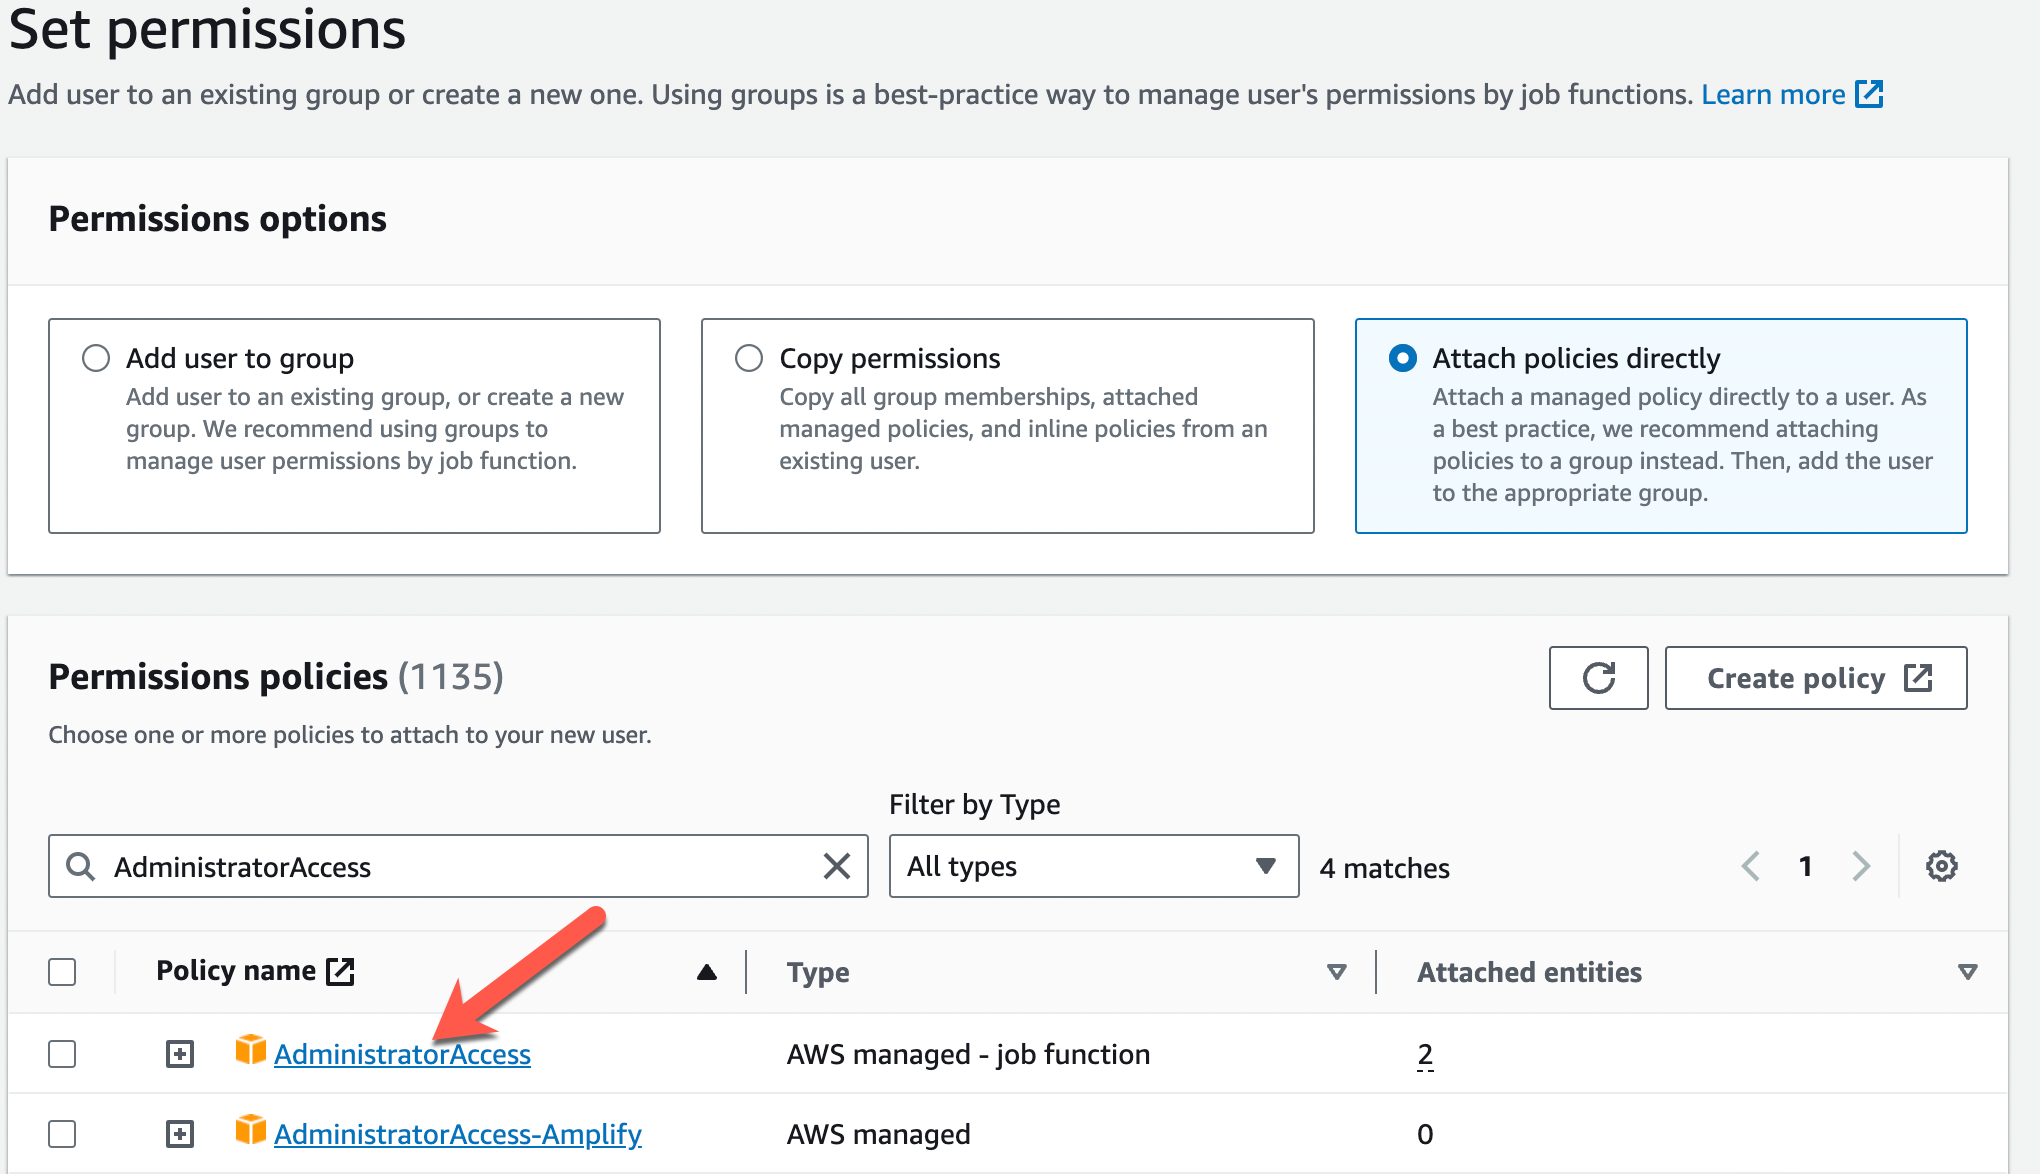
- On the Set permissions screen, select Attach policies directly
- Place a checkbox next to AdministratorAccess

- Click Next
- On the Review and create screen, review the user details and click Create user
Generate user AWS access keys
Here, you generate AWS access keys for the user. These are used by Terraform to authenticate to AWS.
- In the AWS console, go to IAM > Users > jthomas
- Click the Security credentials tab
- Scroll down to the Access keys sections, and click Create access key
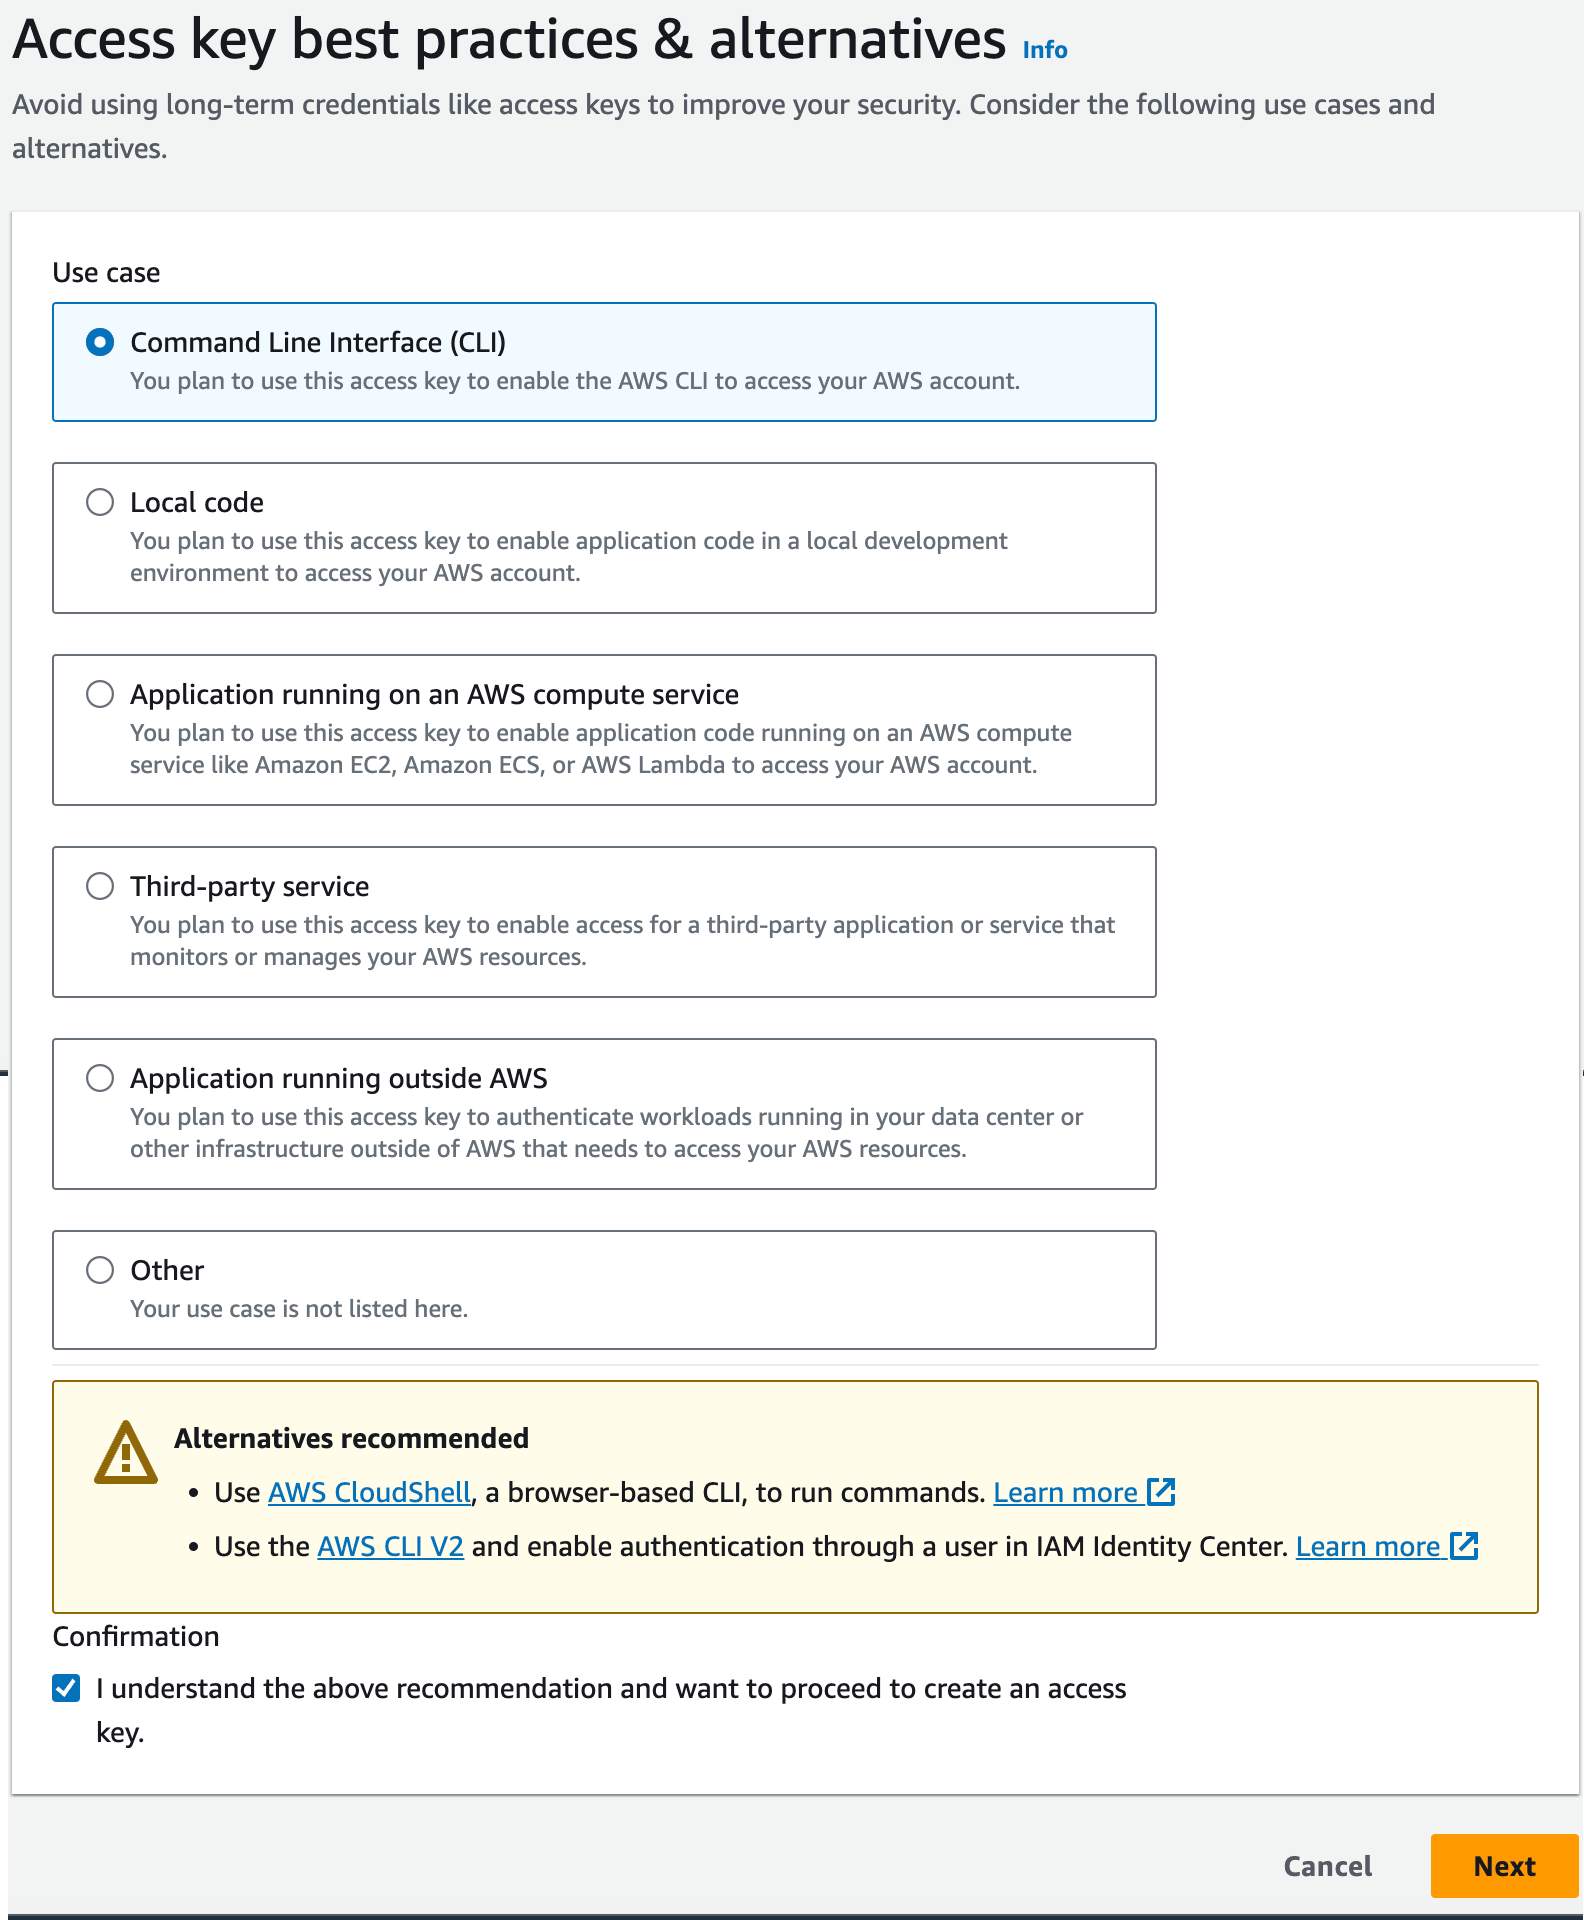
- On the Access key best practices screen, select Command Line Interfaces(CLI)
- Scroll down and place a checkbox in the confirmation box.

- Click Next
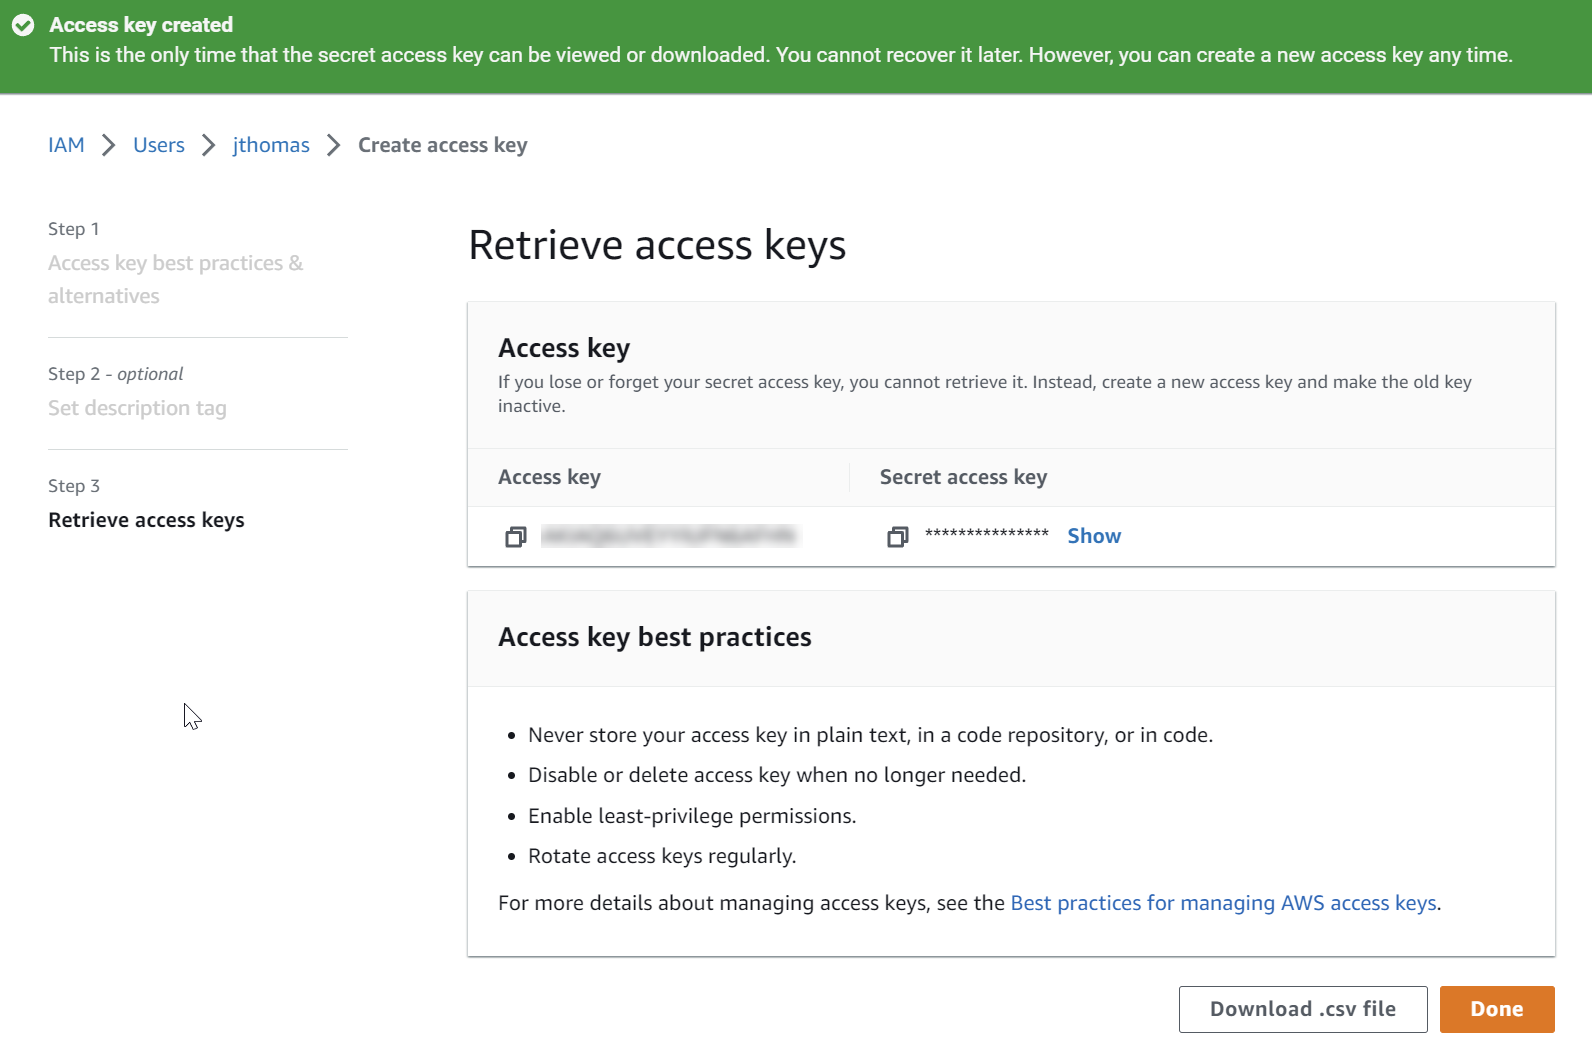
Pro tip: From the Retrieve access keys screen, download the credentials csv file. Otherwise after navigating away from the screen you will no longer be able to view the secret access key.

Configure AWS CLI credentials
In this section, you add the AWS acccess keys into the ~/.aws/credentials file using the AWS CLI. This step updates the default profile. Refer to the AWS documentation for more information on creating custom profiles.
By default, Terraform looks for AWS credentials in ~/.aws/credentials that are using the default profile. Terraform looks for credenitals in many other places such as environment variables or credentials entered directly into the AWS provider configuration. Review the AWS provider docs for more information.
This method of storing credentials is a best practice since it keeps credentials out of any configuration files and does not have to be re-entered with each new terminal session.
Securing credentials is important, even in a lab environment. Let’s move on.
- Configure tne AWS CLI with default credentials by running the
aws configurecommand. - Enter the Access Key ID and Secret Access Key
- Optionally, enter a default region and output format
aws configure
output
AWS Access Key ID [None]: ***********I3P7
AWS Secret Access Key [None]: ******************g04jAN
Default region name [None]: us-east-2
Default output format [None]:
We can verify the AWS CLI is configured correctly by running the following command in our terminal.
aws sts get-caller-identity
output
{
    "UserId": "##########NPCFXCN3IK",
    "Account": "#########9761",
    "Arn": "arn:aws:iam::12345679761:user/jthomas"
}
Those results mean that our AWS environment is setup correctly. Let’s move onto to executing the Terraform code.
Create an AWS VPC with Terraform
In this code example, you will use Terraform to create an VPC in AWS using the following steps:
- Create a new directory on your local PC
- Create Terraform configuration files
- Execute terraform init, plan, apply
- Execute terraform destroy
Create a new directory called terraform
mkdir terraform
Change into the terraform directory
cd terraform
Create a new file called main.tf
The following Terraform configuration file will create a new VPC in the us-east-2 region within your AWS account.
The provider block is used to add custom settings to the provider such a region, credentials etc. Here we are configuring the AWS provider.
The resource block is used to create resources with a specific provider.
aws_vpctranslates to “PROVIDER_TYPE” where provider is the name of the provider and type is the type of resource.maintranslate to “NAME” which becomes identifier that you can use in the Terraform code to reference this resource. For exampleaws_vpc.mainis the variable that can be used in the subnet or route table resource block which requires a vpc argument.cidr_blockis in the “CONFIG” section which consist of arguments that are specific to that resource.
main.tf
provider "aws" {
    region = "us-east-2"
}

resource "aws_vpc" "main" {
  cidr_block       = "10.0.0.0/16"
  instance_tenancy = "default"

  tags = {
    Name = "main"
  }
}
Make sure you are in the terraform directory when running the follwing terraform commands.
Run terrform init to download the AWS provider and initialize the backend. The backend contains the state file terraform.tfstate. This file maps resources to the real world. Review this file before and after running terraform apply.
Initializing the backend...

Initializing provider plugins...
- Finding latest version of hashicorp/aws...
- Installing hashicorp/aws v5.24.0...
- Installed hashicorp/aws v5.24.0 (signed by HashiCorp)
Run terrform plan to view the planned changes.
Terraform used the selected providers to generate the following execution plan.
Resource actions are indicated with the following symbols:
  + create

Terraform will perform the following actions:

  # aws_vpc.main will be created
  + resource "aws_vpc" "main" {
      + arn                                  = (known after apply)
      + cidr_block                           = "10.0.0.0/16"
      + default_network_acl_id               = (known after apply)
      + default_route_table_id               = (known after apply)
      + default_security_group_id            = (known after apply)
      + dhcp_options_id                      = (known after apply)
      + enable_dns_hostnames                 = (known after apply)
<<< output excluded for brevity >>>
Run terrform apply to apply the configuration updates to AWS resources.
Enter Yes, to confirm the apply.
<<< output excluded for brevity >>>
      + ipv6_cidr_block_network_border_group = (known after apply)
      + main_route_table_id                  = (known after apply)
      + owner_id                             = (known after apply)
      + tags                                 = {
          + "Name" = "mcm vpc"
        }
      + tags_all                             = {
          + "Name" = "mcm vpc"
        }
    }

Plan: 1 to add, 0 to change, 0 to destroy.

Do you want to perform these actions?
  Terraform will perform the actions described above.
  Only 'yes' will be accepted to approve.

  Enter a value: yes

aws_vpc.main: Creating...
aws_vpc.main: Creation complete after 1s [id=vpc-0ea4c699a9c8d74c0]

Apply complete! Resources: 1 added, 0 changed, 0 destroyed.
Run terraform destroy to clean up the AWS resources.
That’s it. You have just configured terraform to create AWS resources with just a few lines of code. Then with a single command you removed those resources. Hopefully this helps on you on your cloud journey.